Bond Cleaning Process Explained
Moving out of a rental property can be a stressful period, often punctuated by the daunting task of ensuring the premises are returned to their original pristine condition. This is where a thorough understanding of the bond cleaning process becomes invaluable.
A detailed and systematic approach not only helps in achieving a professional-level clean but also significantly increases your chances of recovering your full rental bond. This guide will break down the essential steps involved in a comprehensive bond clean, from initial preparation to final inspection.
Understanding the Scope of Bond Cleaning
Bond cleaning, also known as exit cleaning or end-of-lease cleaning, is a deep and thorough cleaning service specifically designed for rental properties at the end of a tenancy agreement. The primary objective is to leave the property in a condition that meets or exceeds the standard it was in at the commencement of the lease, minus normal wear and tear. This often involves areas often overlooked in regular cleaning.
Key Areas Covered
A comprehensive bond clean typically encompasses every room and surface within the property. This includes, but is not limited to:
- Kitchen: Deep cleaning of ovens, stovetops, range hoods, dishwashers, sinks, countertops, cabinets (inside and out), and splashbacks.
- Bathrooms: Sanitizing toilets, showers, bathtubs, basins, mirrors, and tiles. Thorough cleaning of exhaust fans and grout.
- Bedrooms: Dusting and cleaning of wardrobes (inside and out), skirting boards, and light fixtures.
- Living Areas: Cleaning of windows (inside and out), window tracks, doors, door frames, skirting boards, light switches, and light fixtures.
- Flooring: Deep vacuuming of carpets and mopping of hard floors.
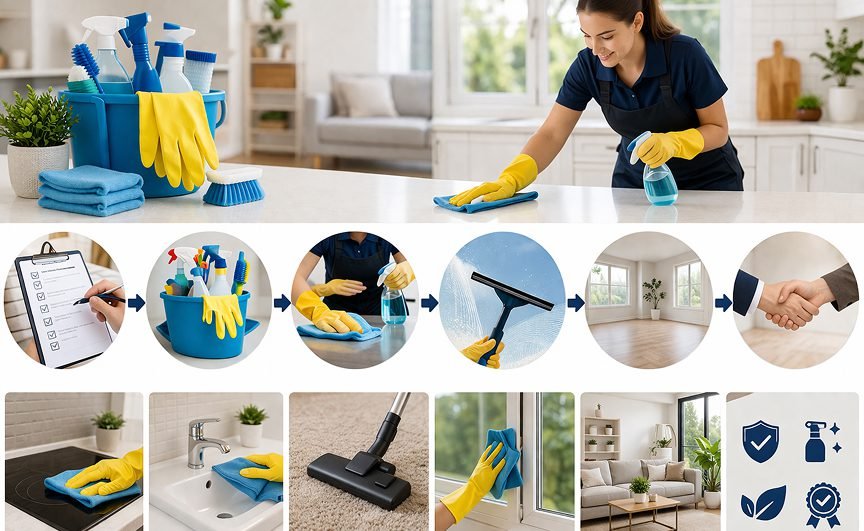
The Step-by-Step Bond Cleaning Process
Executing a successful bond clean requires a structured methodology. Following these steps will ensure no crucial detail is missed, streamlining the entire process.
1. Preparation and Planning
Before commencing any cleaning, it’s essential to create a detailed checklist. This checklist should align with your lease agreement’s requirements and your property manager’s expectations. Gather all necessary cleaning supplies and equipment, ensuring you have appropriate solutions for different surfaces to avoid damage.
2. Decluttering and Initial Dusting
Begin by removing all personal belongings and any accumulated rubbish. The next step is to perform a thorough dusting of all surfaces, starting from the highest points and working your way down. This includes light fixtures, ceiling fans, tops of cabinets, and walls.
3. Kitchen Deep Clean
The kitchen is often the most scrutinized area. Dedicate significant time to cleaning appliances. For ovens, this may involve degreasing and removing baked-on residue. Exhaust fans should be meticulously cleaned to remove grease build-up. Don’t forget the interior of all cabinets and drawers.
4. Bathroom Sanitization
Thoroughly disinfect all bathroom surfaces. Pay close attention to grout lines, which can accumulate mould and mildew. If showers have glass doors, ensure they are free from water spots and soap scum. Mirrors should be streak-free.
5. Living Areas and Bedrooms
Clean all windows, including the tracks and frames, as dirt and grime can accumulate here. Wipe down all skirting boards, doors, and door frames. This attention to detail is often what differentiates a standard clean from a bond clean.
6. Floor Care
Vacuum carpets thoroughly, paying attention to edges and corners. For hard floors, a deep mop is required, ensuring all dirt and residue is removed.
Final Inspection and Documentation
Once the bond cleaning process is complete, conduct a final walk-through of the property. Compare the condition against your initial checklist and the original condition report. Taking high-resolution photos or videos of the cleaned property can serve as valuable documentation, especially if any disputes arise regarding the cleanliness upon vacating. This proactive approach safeguards your deposit.
Frequently Asked Questions About Bond Cleaning
Q1: What is the primary goal of the bond cleaning process?
A1: The primary goal of the bond cleaning process is to return the rental property to its original clean condition at the start of the tenancy, ensuring the tenant can recover their full rental bond.
Q2: How long does a typical bond cleaning take?
A2: The duration of a bond cleaning can vary significantly depending on the size and condition of the property. A standard 2-3 bedroom house might take 6-10 hours for a professional team.
Q3: Is carpet cleaning included in bond cleaning?
A3: Yes, professional carpet cleaning is almost always a mandatory part of the bond cleaning process to ensure they are free from stains and odors.
Q4: Can I do bond cleaning myself?
A4: While you can perform the bond cleaning yourself, it requires meticulous attention to detail and often specialized cleaning products and equipment to achieve professional results. Many tenants opt for professional services to guarantee satisfaction.
Q5: What happens if the landlord is not satisfied with the bond cleaning?
A5: If the landlord is not satisfied, they may deduct cleaning costs from your bond. Having professional receipts and documentation of the bond cleaning process can help contest unfair deductions.
Conclusion: Securing Your Bond Through a Meticulous Bond Cleaning Process
The bond cleaning process is a critical component of vacating a rental property. By meticulously following a structured approach, focusing on all areas from kitchens to bathrooms and beyond, you significantly enhance your ability to reclaim your full rental bond.
Remember, a thorough clean is not just about tidiness; it’s about fulfilling your lease obligations and ensuring a smooth transition to your next home. For peace of mind and a guaranteed professional finish, consider engaging a reputable bond cleaning service.
Ready to ensure a spotless exit and get your bond back? Contact us today to discuss your exit cleaning needs or to book our professional bond cleaning services!